Backup and restore
The backup module keeps a copy of your Emoncms data and restores it after a failure or on a new SD card. Open it from Setup > Backup. It has two tabs, Backup and Restore.
The backup module works on local installs such as the emonPi and emonBase. For emoncms.org, see Back up a remote account.
What is included
Included:
Emoncms accounts, inputs, input processing, feeds, dashboards and apps.
Feed data.
emonHub configuration,
emonhub.conf.
Not included:
WiFi and network settings.
Other changes to the system.
Back up to a drive
Emoncms can back up every day to a USB drive or a network share. Each run copies only new data, a few MB a day.
Plug in a USB drive.
Go to Setup > Backup and click Scan for drives.
Choose the drive:
Set up this drive mounts the drive as it is. Nothing on it is erased.
Erase and format erases the whole drive and formats it as btrfs. Type
ERASEto confirm. btrfs compresses feed data by about 80%, checks every block for damage, and keeps dated copies of feed data as well as the database.
The daily backup turns on. Click Back up now to run the first backup.
The status line at the top of the Backup tab shows whether your data is protected:
Green: a recent backup exists and the daily backup is on.
Amber: the drive is disconnected, no backup has run yet, the last backup is more than two days old, or the daily backup is off.
Red: the last backup failed, the last backup is more than a week old, or the drive does not respond.
A full check runs every Sunday. To run one now, click Verify and repair.
The Restore points card lists the dated database copies on the drive. The last 7 daily and 4 weekly copies are kept.
Note
Backup to a drive is on by default on a Raspberry Pi. On other systems, see the backup module readme.
Download a portable copy
A portable copy is one .tar.gz file that holds everything. Keep it off site, or use it to move to another system.
On the Backup tab, under Portable copy, click Build archive.
When the archive is built, click Download.
The archive holds all data each time, so it is larger and slower than a drive backup.
Restore
Warning
Restoring replaces all Emoncms data on this system. Inputs, feeds, dashboards and feed data are all replaced by the copy you restore from.
The current database is saved before a restore, so a restore started by mistake can be undone. Feed data is not saved.
Open the Restore tab and choose a source:
From the backup drive: choose a restore point and click Restore from drive.
From an archive file: upload a
.tar.gzarchive and click Upload and restore. Browsers limit the upload size. For a large archive, see the backup module readme.From an old emonSD card: put the card in a USB card reader, plug it in and click Import from SD card.
Tick I understand this overwrites all Emoncms data on this system to confirm.
When the restore is complete, log out and log in with the restored account details.
Move to a new SD card
To move to a new emonSD image, set up a new SD card and import the data from the old one. The old card stays unchanged as a backup.
Prepare the new card
Buy a card with emonSD installed from the OpenEnergyMonitor shop, or write the latest image from emonSD download to a card of 16 GB or more. balenaEtcher is a simple tool for writing images.
Swap the cards
Go to Setup > Admin > System Info and click Shutdown. Wait 30 seconds, then unplug the power.
Remove the old SD card. On an emonPi, remove the end plate with a Torx T20 bit first.
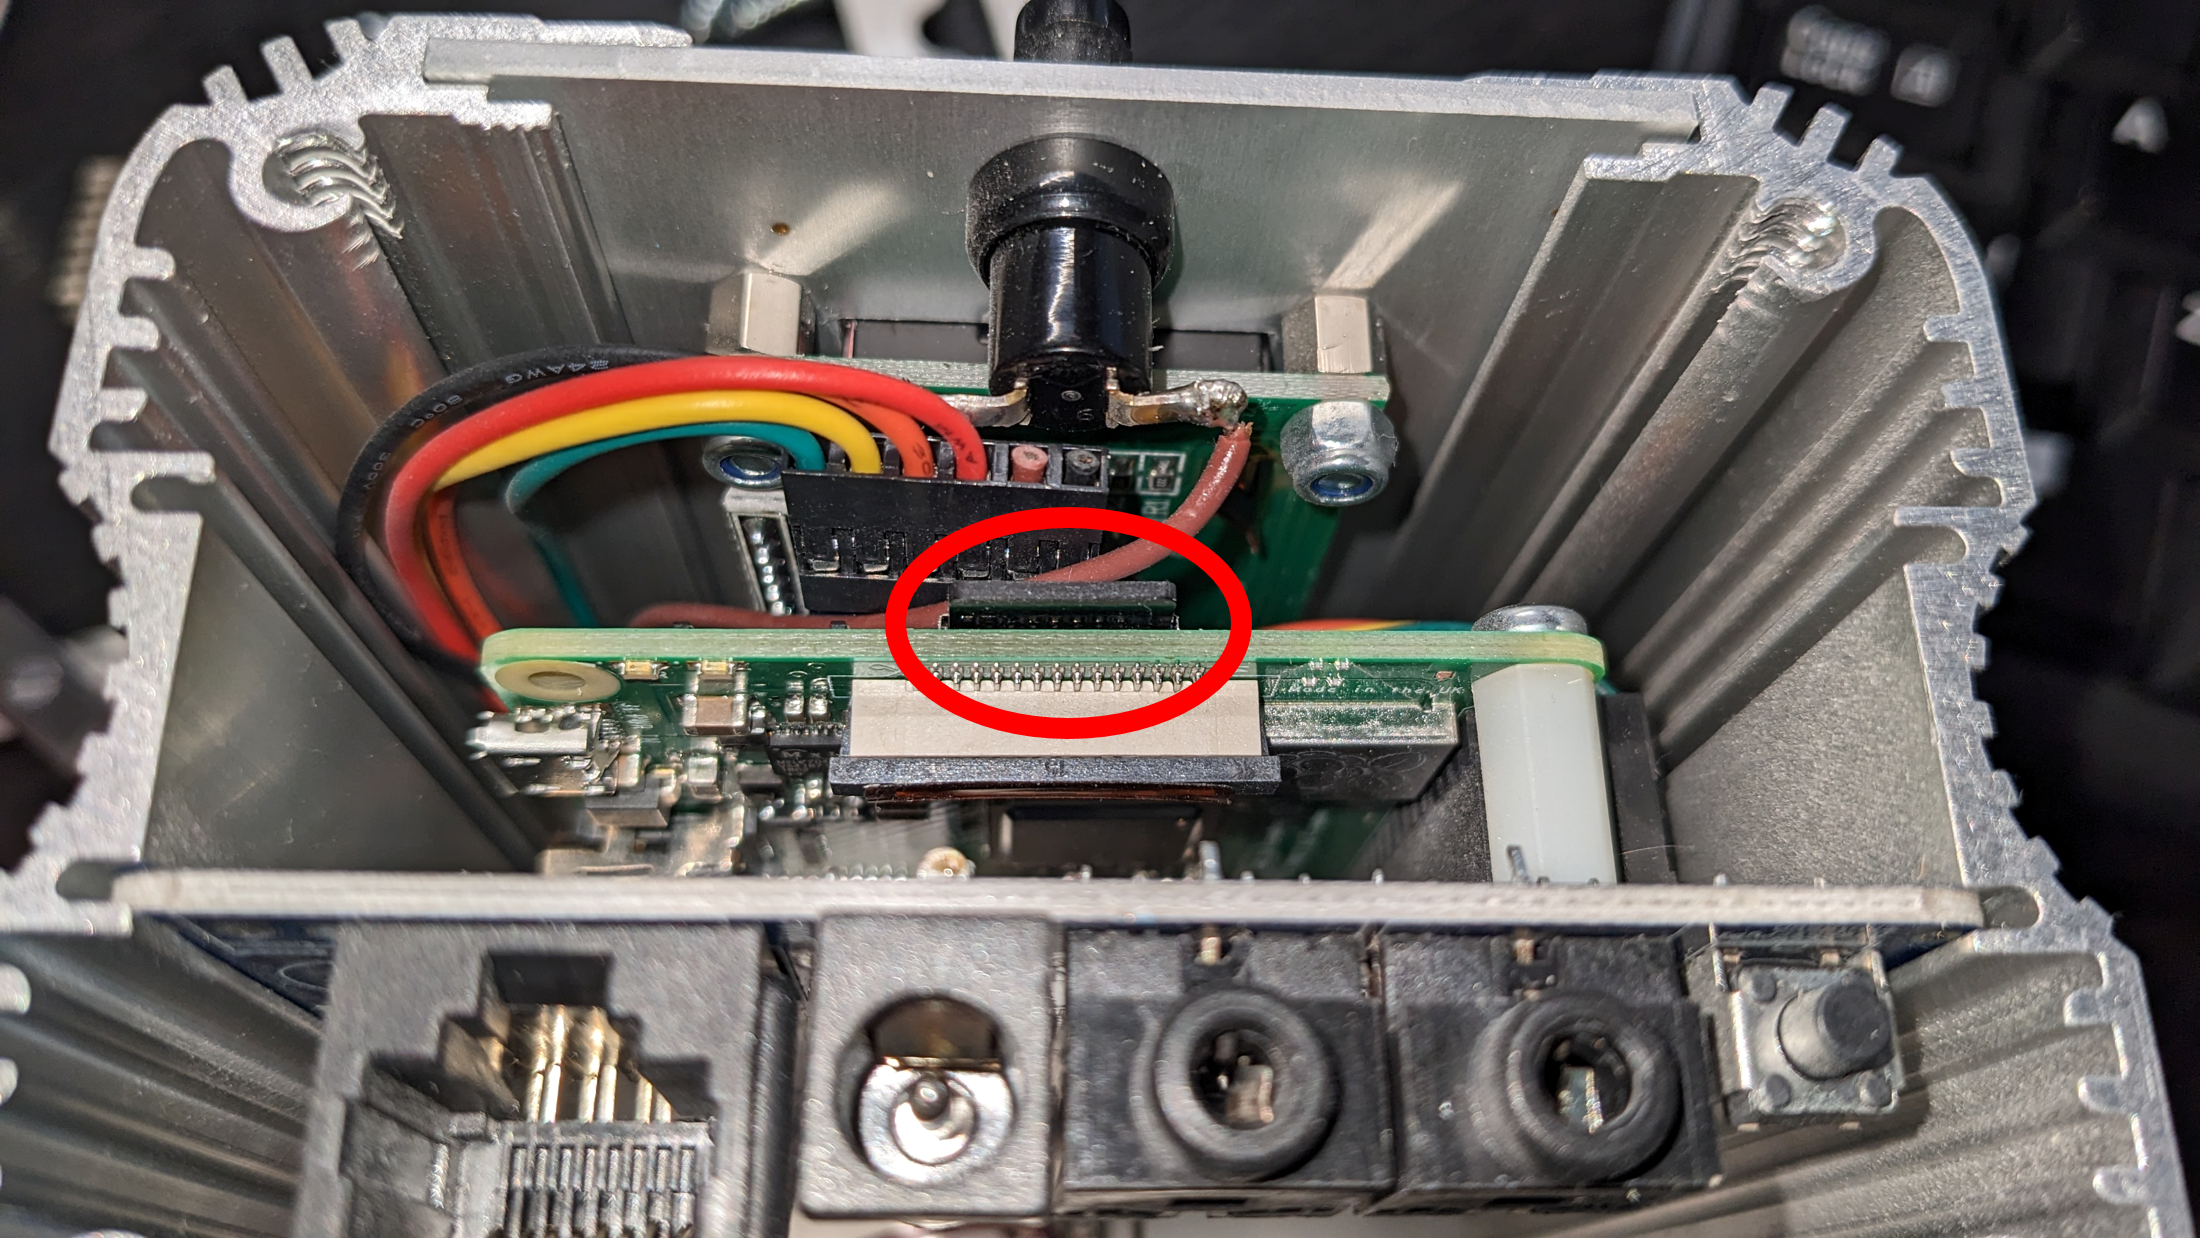
Insert the new card, refit the end plate and power up.
Connect to the network. See Connect. The first boot runs updates and takes a while.
Import the old card
Put the old SD card in a USB card reader and plug it into the emonPi or emonBase.
Open Emoncms and log in with the default account from emonSD download. The import replaces it with your original account.
Go to Setup > Admin > Update and run Full Update.
Go to Setup > Backup, open the Restore tab and click Import from SD card.
When the import is complete, log out and log in with your original account details.
Fix a corrupt card
If the old card does not mount, fsck may repair it. With the card in a USB reader, connect via SSH (credentials) and run:
sudo fsck.ext4 /dev/sda2    # system partition
sudo fsck.ext2 /dev/sda3    # data partition
Then run the import again.
Back up a remote account
The backup module cannot back up emoncms.org or another remote server. Use one of these:
Sync module: download all feeds from the remote account to a local emonPi, emonBase or Raspberry Pi. You can browse the data locally afterwards. See Sync.
Python backup script: download feed data to a computer, with an option to convert it to CSV. See the forum post.
Back up a whole server
To back up every account on your own server:
Stop the services that write data, so the files are not changing:
sudo systemctl stop emonhub emoncms_mqtt feedwriter apache2
Export the database:
mysqldump -u root -p emoncms > emoncms_backup.sql
Copy the feed data directories. On emonSD they are under
/var/opt/emoncms(phpfina,phptimeseries). On other installs, checksettings.ini.Copy
settings.inifrom the Emoncms directory, usually/var/www/emoncms.Start the services again.
Help
If a backup or restore fails, post on the community forum. Include the log shown on the backup page and the server information from Setup > Admin > System Info.