Getting started: emonPi and emonBase
Set up Emoncms on an emonPi or emonBase, log your first feeds and, if you want, send data to emoncms.org.
Before you start
The emonPi or emonBase is powered up and connected to your network. See Connect.
Open its address in a browser, for example
http://emonpi.local. The Emoncms login page appears.
Log in
Log in with username emonsd and password emonsd. Change the password afterwards on the My Account page.
Emoncms opens on the Feeds page. It is empty until you create feeds.
Check your inputs
Go to Setup > Inputs. Data from the emonPi, and from an emonTx or other node sending to an emonBase, appears here automatically.
Each input holds only its latest value. To record history, log the input to a feed. See Core concepts.
Log inputs to feeds
This example logs a power input, such as P1 from an emonTx4, and creates a cumulative kWh feed from it.
Click the spanner icon on the input.
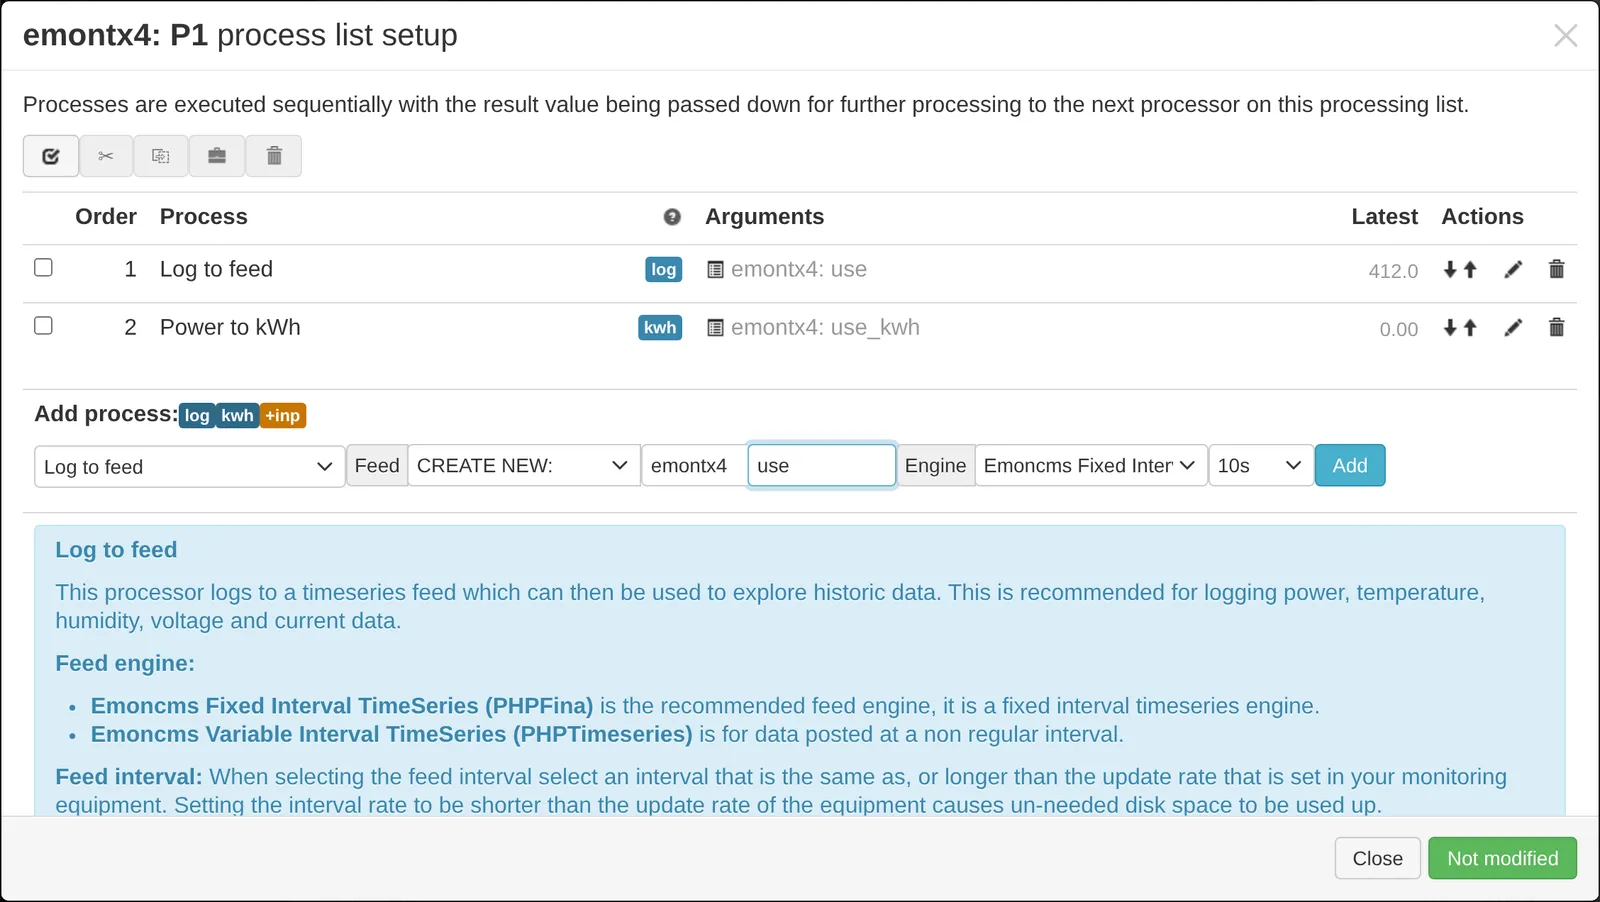
In the process list dialog:
Select Log to feed.
Under Feed, choose CREATE NEW: and enter a name, for example
use.Leave Engine set to Emoncms Fixed Interval TimeSeries.
Select an interval of 10s for an emonPi or emonTx, or 60s for an emonTH.
Click Add.
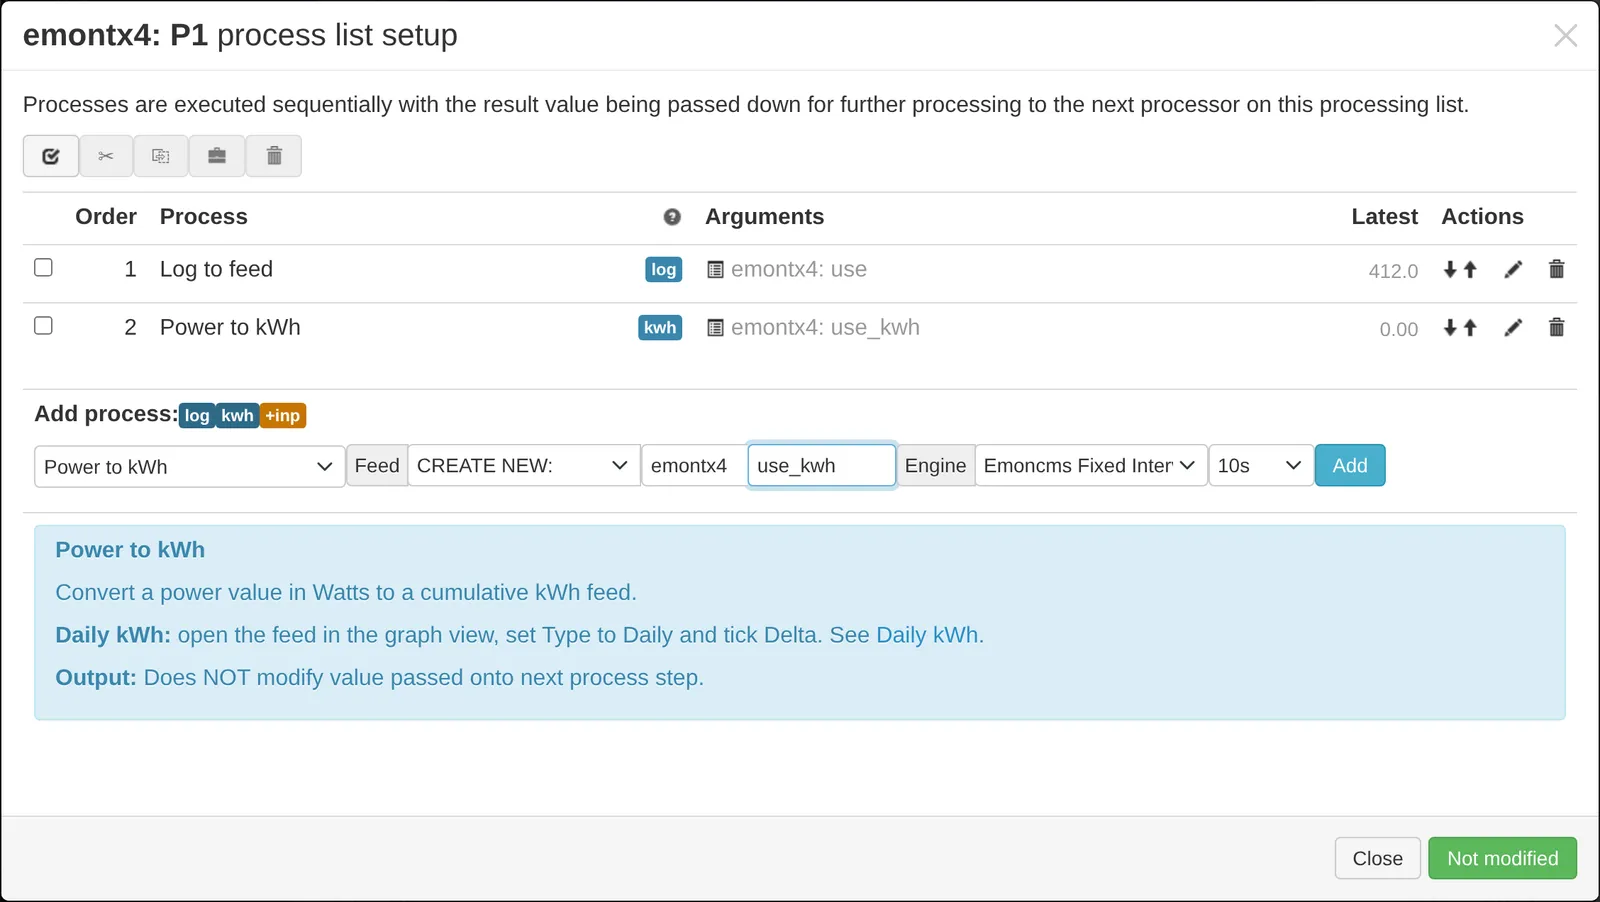
To add daily kWh for a power input:
Select Power to kWh.
Create a new feed, for example
use_kwh, with the same interval.Click Add.
The emonTx4 and recent emonPi firmware also send cumulative energy for each CT channel. You can log those inputs in place of Power to kWh. See Daily kWh.
Click Changed, press to save, then Close.
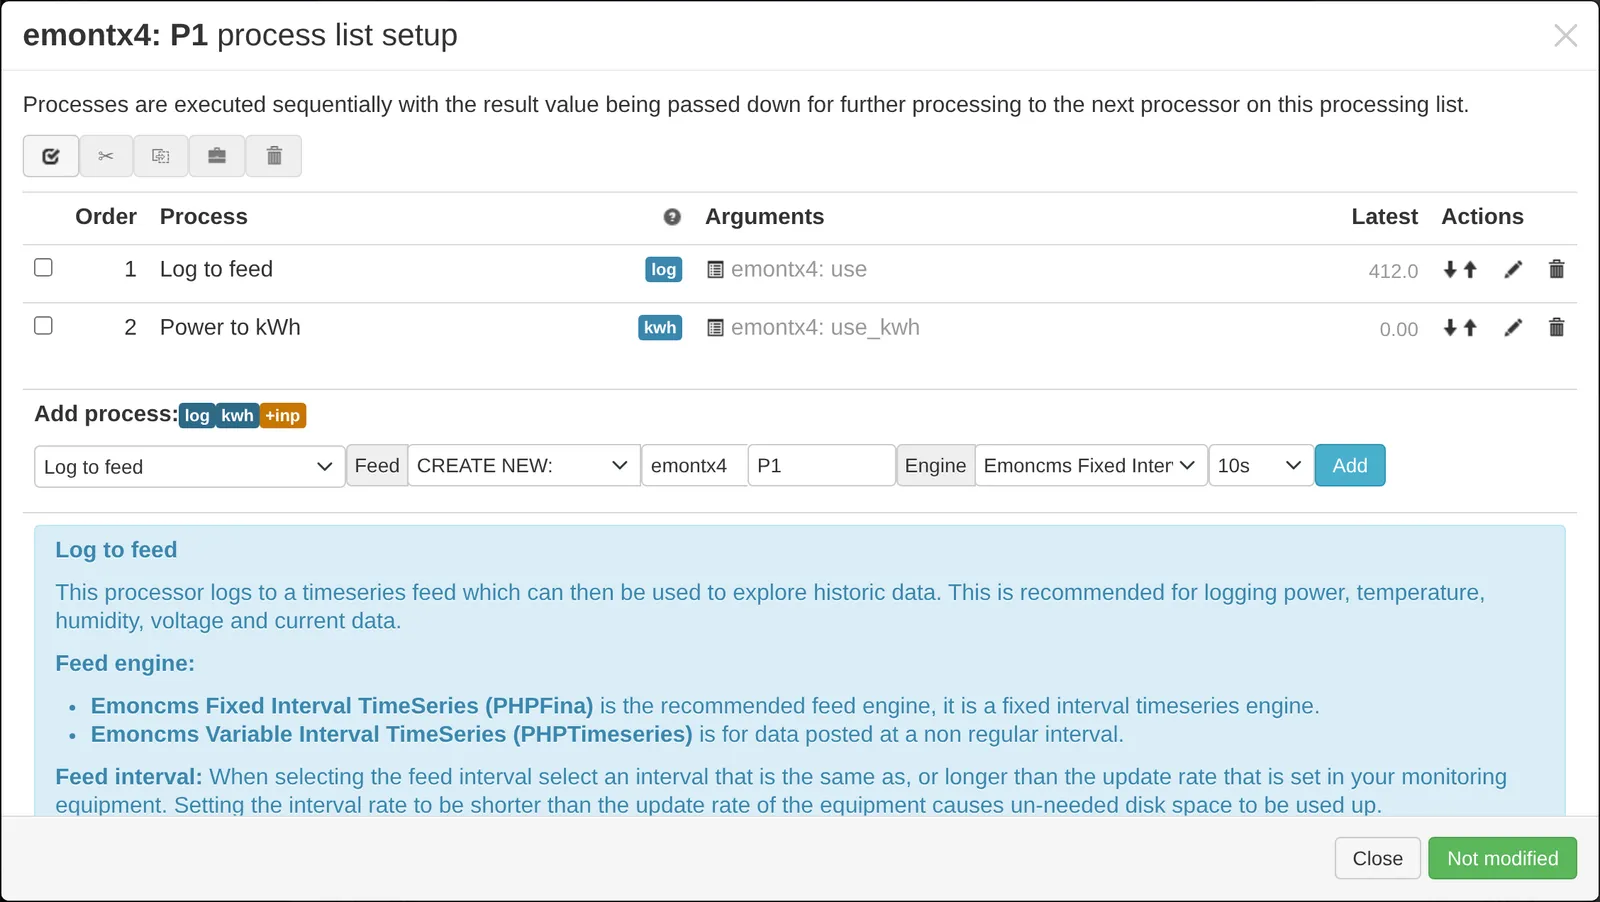
The input now shows its processes as short labels, such as
logandkwh.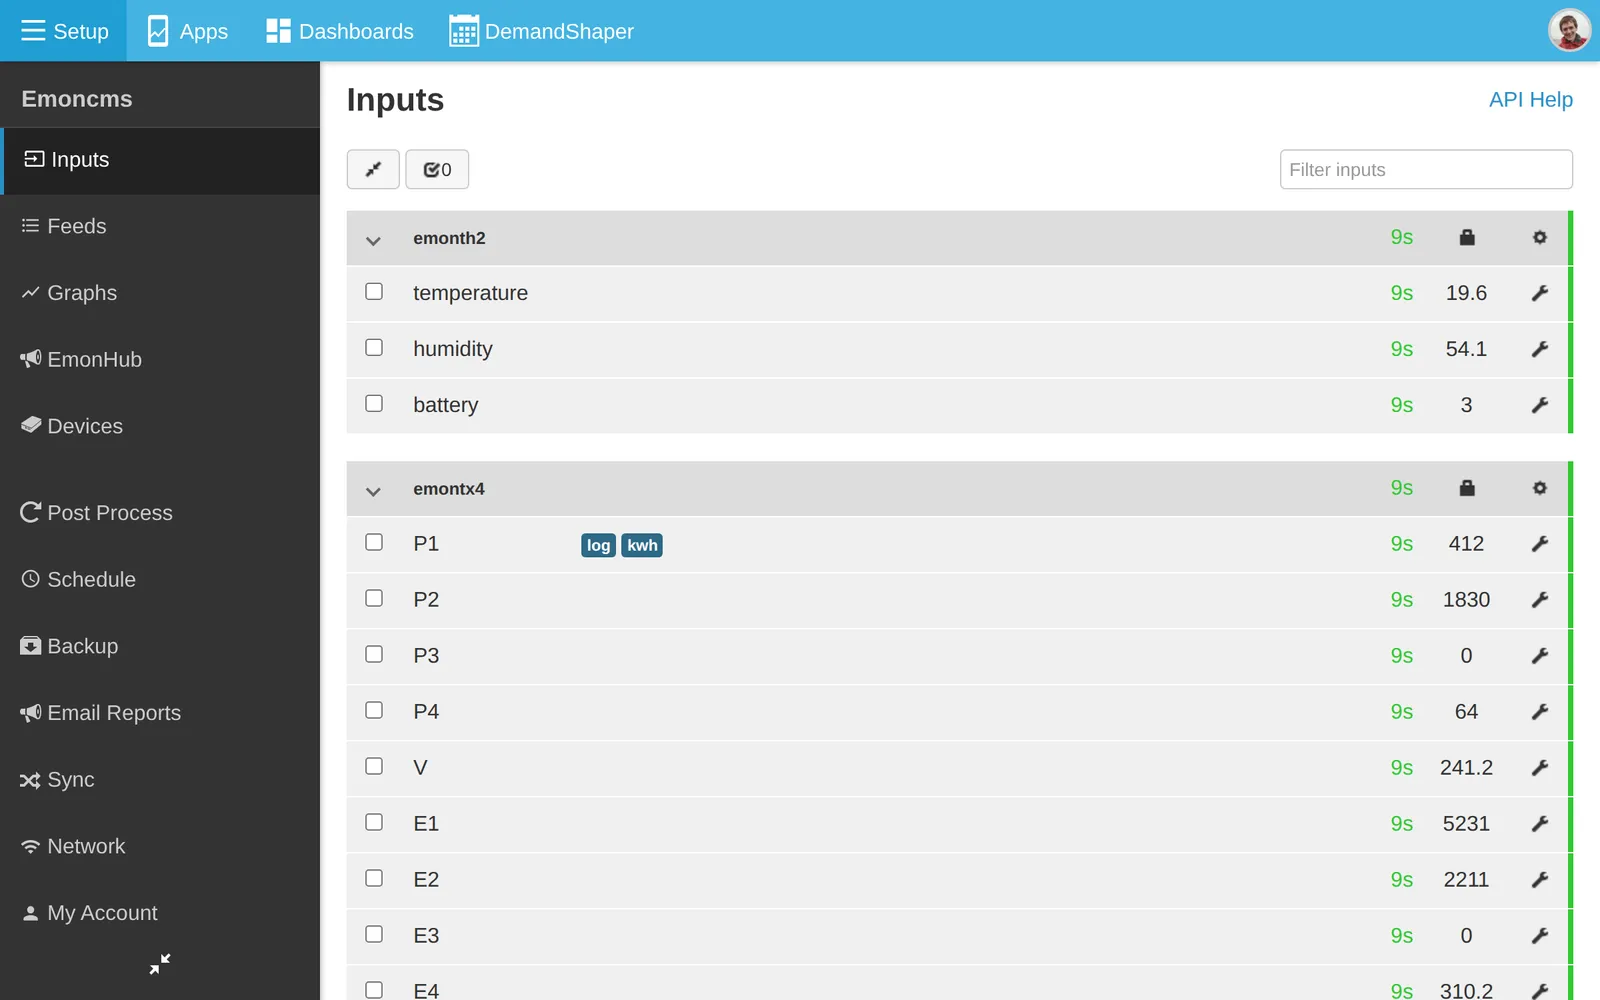
Note
Do not choose an interval shorter than the rate at which the device sends data. A longer interval is fine and uses less disk space.
Use the default feed names where they apply, such as use, solar and heatpump_elec. Apps then find the feeds without manual selection.
For hardware with a device template, such as the emonTx4, the device module can create all inputs, processes and feeds in one step. See Devices.
View the data
Go to Setup > Feeds. The new feeds are listed and update every few seconds.
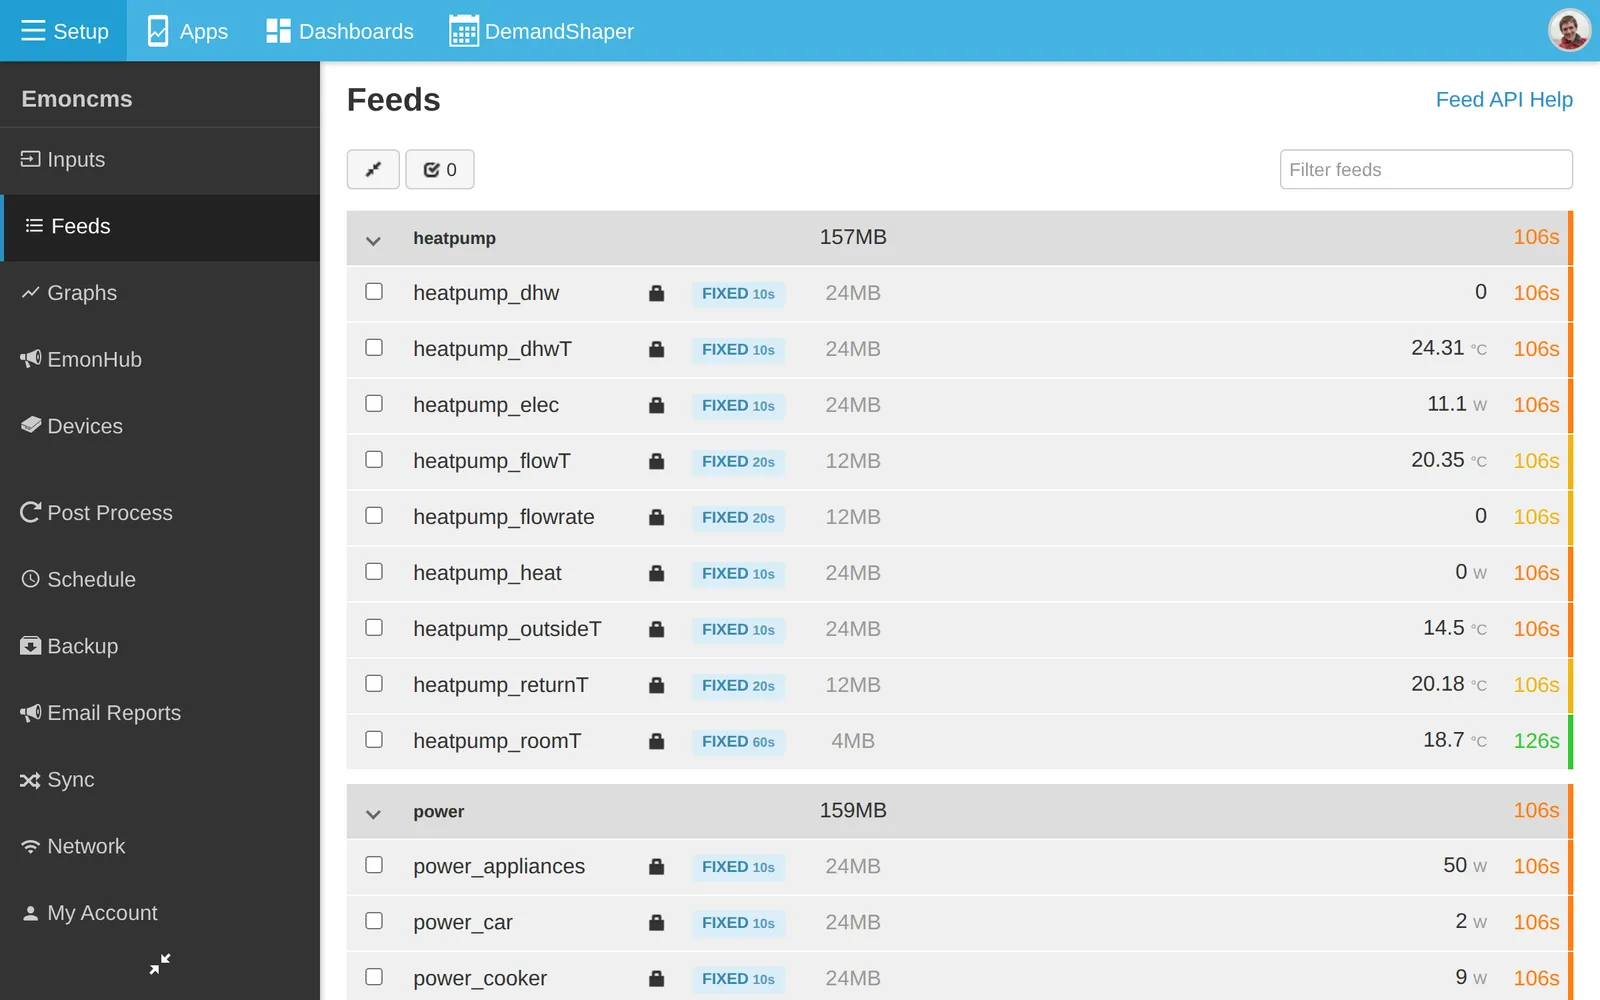
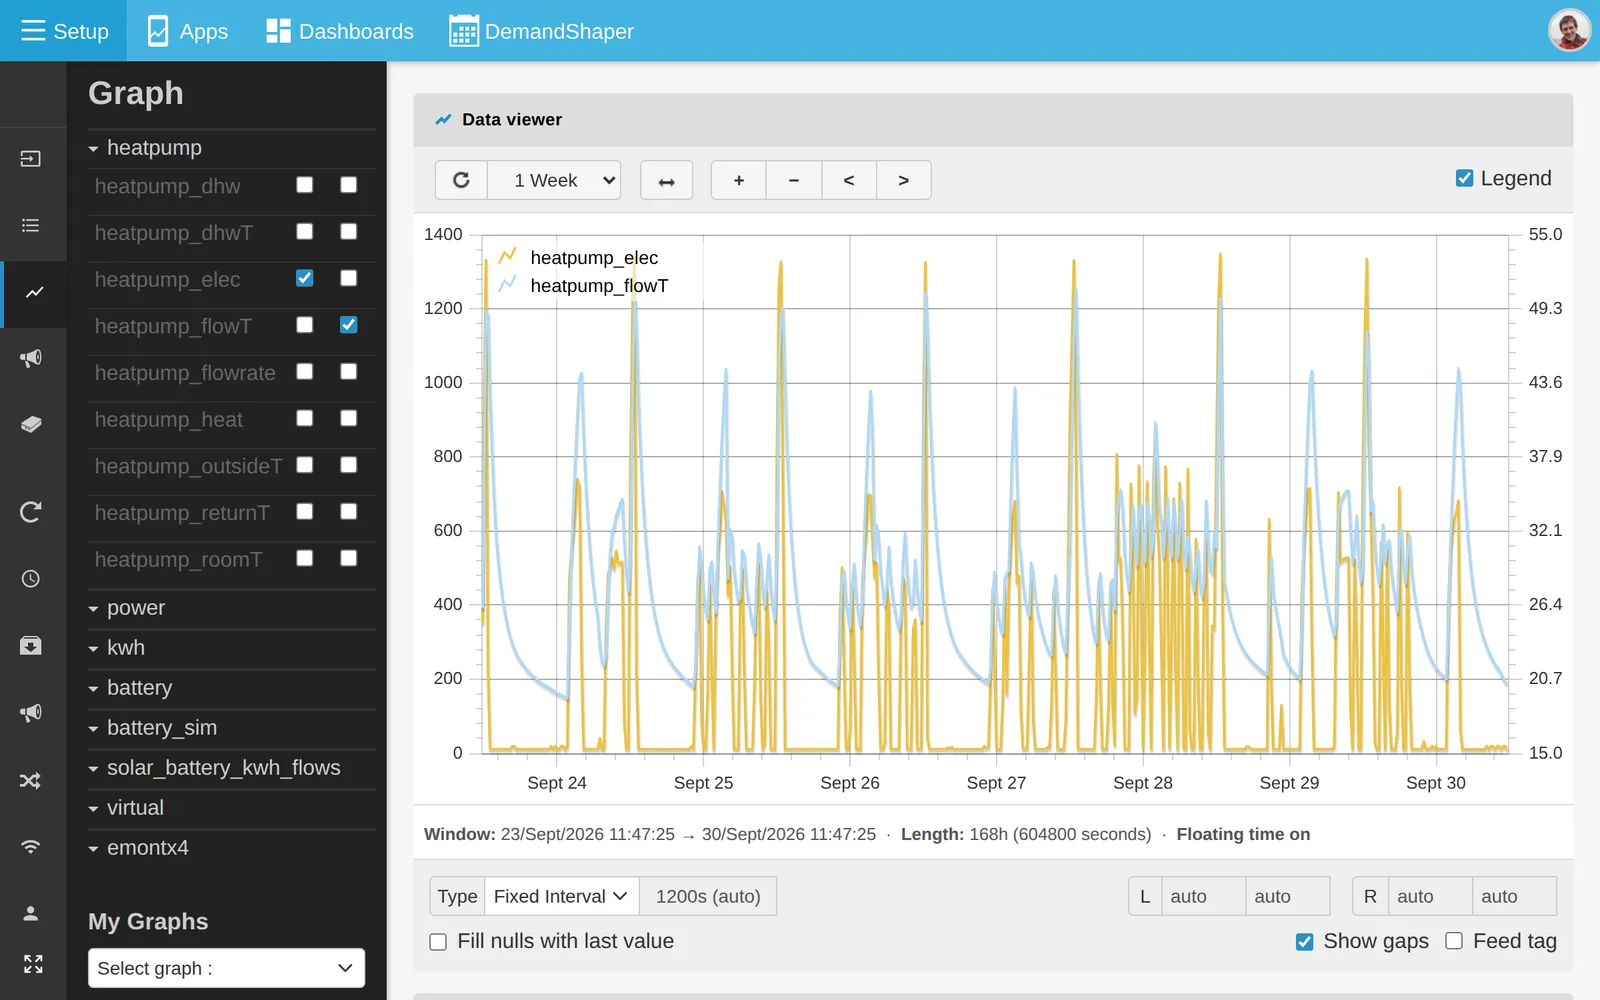
Click a feed to open it in the graph view. There is little data at first. Zoom in to the last few minutes, or come back later.
Next steps:
emonHub
emonHub runs on the emonPi and emonBase alongside Emoncms. It reads data from the hardware and passes it to Emoncms over MQTT. It can also send data to emoncms.org.
Go to Setup > EmonHub to see the emonHub log. The log helps when inputs do not appear. Click Edit config to edit the emonHub configuration.
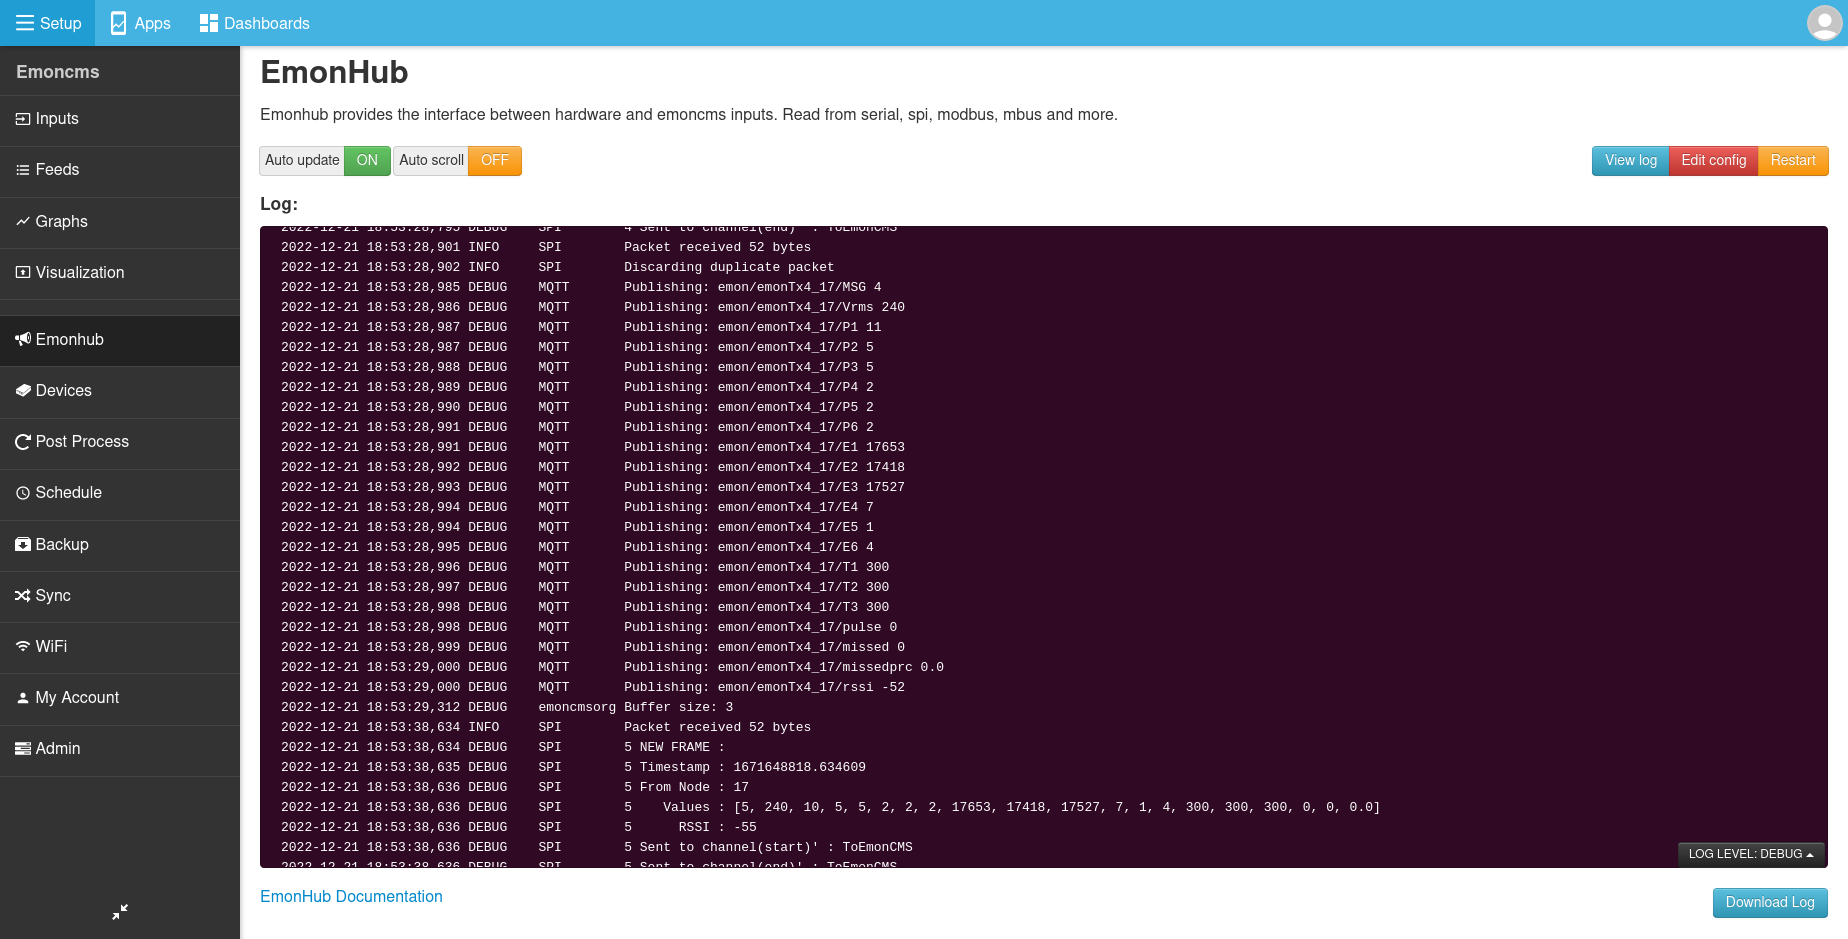
emonHub also reads many other devices, such as Modbus and M-Bus meters, DS18B20 temperature sensors, solar inverters and batteries. See emonHub and emonHub interfacers.
Local or remote
Data logged on the emonPi or emonBase stays in your home and needs no subscription. The SD card holds many years of data.
You can also send data to a remote server:
emoncms.org, our hosted service. See Getting started: emoncms.org.
Your own server. See Install.
A remote server suits public dashboards and access from anywhere. You can log locally and remotely at the same time.
To reach your local Emoncms from outside your home, see Remote access.
Send data to emoncms.org
There are two ways:
emonHub sends input data. You set up input processing again on emoncms.org. Follow the steps below.
Sync module uploads the feeds you record locally. You set up input processing once, on the emonPi or emonBase. Uploads resume after an internet outage. See Sync.
To send input data with emonHub:
Create an account on emoncms.org and copy the Read & Write API Key from the My Account page.
On the emonPi or emonBase, go to Setup > EmonHub and click Edit config.
Find the
[[emoncmsorg]]section and replacexxxxxxxxxxxxxxxxxxxxxxxxxxxxxxxxafterapikey =with your key.Click Save.
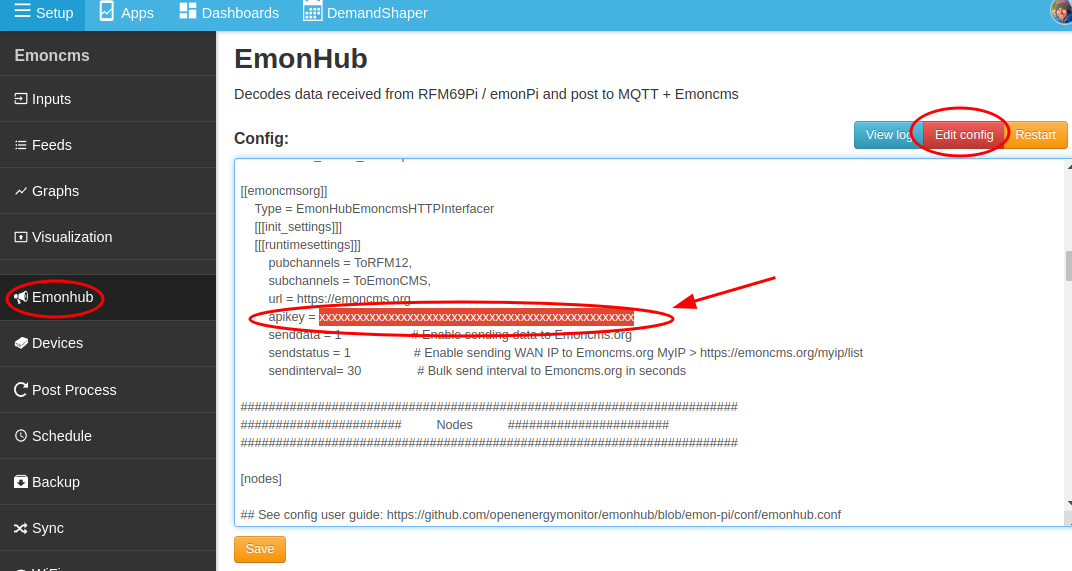
The inputs appear on emoncms.org within a minute. Set up input processing there as above.